How to Create VRM File
VRM is a data format to mainly deal with humanoid avatar data aimed for VR apps. The format is based on a standardized 3D data format called glb.
By using the VRM as a shared format, you can enter the worlds of various apps in the same avatar.
In the Vket we are using this glb and VRM to set the models in the browser venue “VketCloud”.
Here, we will explain the glb for your prospective Web Submission of your 3D models like accessories. For items other than Humanoid avatar, please refer to How to Create glb File.
What can it be used for?
Basically, you can use the file on any VRM applications.
The file format is compatible with streaming apps for Vtubers, avatar photography apps, and certain VRSNS.
Once you turn your model into VRM, you may utilize the model for many things other than VketMall-Proto Web Submission.
How to create a VRM file
VRM files can be created by converting the original file with “UniVRM” on Unity.
Here we will go over the workflow.
*For details, please refer to the official reference of the VRM consortium.
https://vrm.dev/en/how_to_make_vrm/
1. Import “UniVRM" into the Unity
Firstly, download the UniVRM. Since the latest version may not be stable, we recommend to use UniVRM-0.66 that are flagged as Latest Stable version by the developers.

2. Open the Unity project.
Before opening, please check whether the version supports UniVRM. In the case of UniVRM-0.66, as long as the version is later than 2018.4.LTS you may use the software without issues.

3. Import the downloaded UniVRM into the Unity project.
4. Import model data such as FBX and texture.
- Import all necessary files for your model into the Unity.
- Set fbx material of the model.
- In VRM you may only use 3 kinds of shaders: MToon, Unlit, or Standard. If you are already using different shaders, please replace them with either one of MToon, Unlit, or Standard.
- For instance, in the below example we have changed the shader from Mnmr shader to MToon.

5. Set the model as Humanoid

6. “Normalize” the model
We will then temporarily turn the adjusted model into VRM and make necessary settings.
- Place the imported model on the scene.

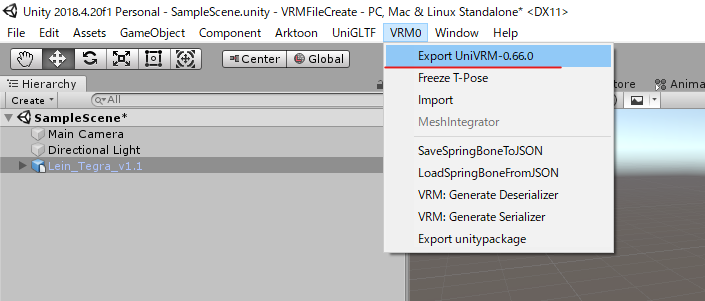
- Open [VRM0] > ]Export UniVRM-x.xx.x(version number)] from the menu.
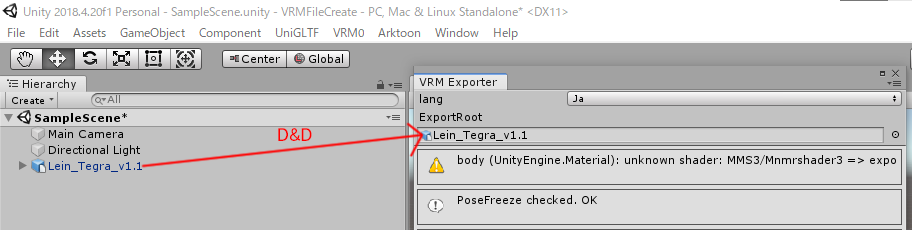
- You will see the VRM Exporter. Drop the model from the Hierarchy to [ExportRoot].
7. Input your license information.
8. Export it. All Vrm files exported will be saved to the location of your choice.

- If there were any other error you may not be able to export. Check the error message and readjust based on the official reference.
https://vrm.dev/en/how_to_make_vrm/convert_from_humanoid_model/
9.Adjust the model
Here, we will readjust the “normalized” model to completion.
- Reimport the Exported VRM file to the Unity.
If you have exported the vrm file under [Unity project under work]>Asset vrm, you do not need to reimport the file.
- Place the VRM mocel on the scene.

- Select the VRM model and make various settings from the inspector, like the title, author and license information.

- Other than that you may also set expressions and movable parts at this moment. For details please refer to the official reference.
https://vrm.dev/en/how_to_make_vrm/setup_vrm/
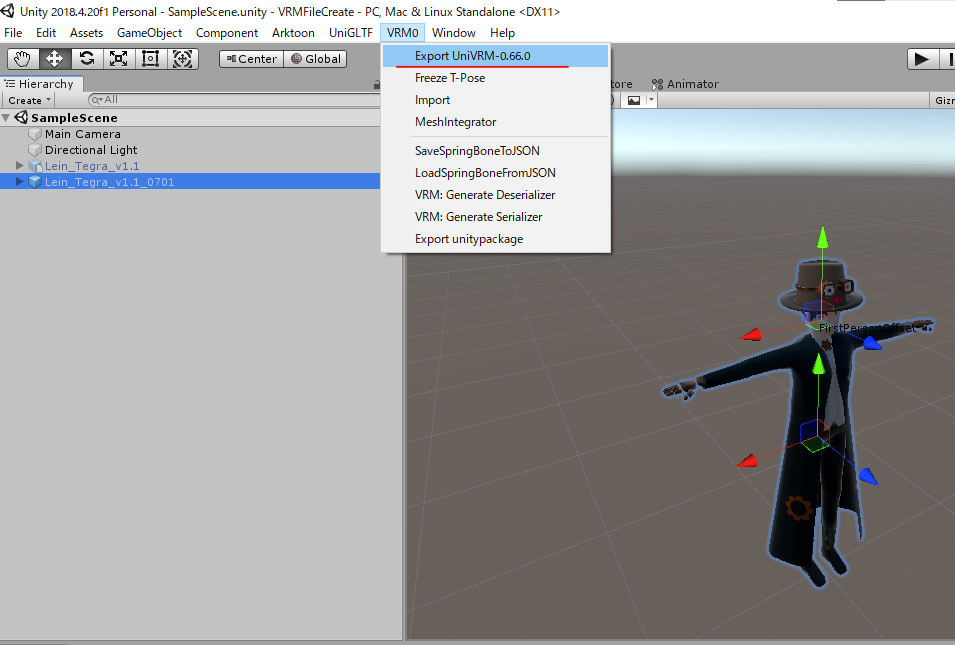
10.Make final export of the VRM model
Once the adjustments are done, select the VRM model and select[VRM0] > [Export UniVRM-x.xx.x(version number)] from the menu again.
Export with the VRM Exporter and save at the location of your choice.
Now your VRM file is complete!
Thank you!